 how-to
7 Steps to Install Custom Copper Metal Siding
Last Updated: October 30, 2026
Quick Summary
Installing copper siding means building a layered wall assembly, planning a panel layout from a control line, and fastening custom-formed panels with concealed clips that allow the copper to move. The seven steps run from wall preparation and layout through seams, corners, flashing, fasteners, and seasonal maintenance.
- Check sheathing flatness with a 1.2 m level, because copper telegraphs every bump.
- Snap a chalk line at the center of the most visible elevation and lay panels outward.
- Use stainless steel or copper fasteners to avoid galvanic corrosion with the copper.
- Fix panels at a single point with clips so they can expand and contract.
- Rinse the wall with plain water each spring and skip abrasive cleaners.
Table of Contents
- What You'll Need Before You Start
- Step 1: Prepare the Wall Assembly and Substrate
- Step 2: Plan Your Panel Layout and Installation Sequence
- Copper Siding Installation Details for Seams, Corners, and Flashing
- Copper Siding Fasteners and Concealed Attachment Systems
- Copper Siding Expansion and Contraction: Getting the Gaps Right
- Copper Siding Patina and Maintenance Through the Seasons
- Request a Custom Copper Siding Quote
- Frequently Asked Questions
What You'll Need Before You Start
Installing custom copper metal siding is a job that rewards preparation. Get the front end right and the panels go up square, flat, and watertight.
The projects that go smoothly share one thing: the installer measured twice and had every tool on site before the first panel was cut.
Below, we walk through the seven steps that take a custom copper wall from bare sheathing to a finished, weather-tight assembly. We also cover the details most guides skip: how copper moves, how to fasten it without oil canning, and how the patina changes over time.
Copper siding is a wall cladding system made from copper sheet, formed into panels and attached over a prepared wall assembly.
Three things separate a good copper wall from a problem wall:
- Custom sizing. Copper panels are formed to the wall, not cut from stock.
- Movement allowance. Copper expands and contracts with temperature.
- Water management. Walls shed water differently than roofs.
Get these right and the rest is craft.
Tools and Safety Gear
You need the right tools before you touch a panel. Copper is soft, and the wrong blade or a dull shear will stretch and distort the edge.
Hand and power tools:
- Hand seamers and locking pliers
- Electric or hand shears for straight cuts
- Nibbler for inside corners and cutouts
- Fine-tooth circular saw blade for panel trimming
- Tape measure, chalk line, and 1.2 m level
- Laser level for long runs
Safety gear:
- Cut-resistant gloves (copper edges are sharp)
- Safety glasses or a face shield
- Hearing protection when cutting
- Non-slip boots, because copper panels get slick
- Fall protection if you are working above grade
Watch out: Copper sheet edges cut deep and fast. Wear cut-resistant gloves for the whole job, not just the cutting stage. Most hand injuries on copper jobs happen while handling finished panels.
Site Measurements and Building Takeoff
A building takeoff is a full count of every panel, trim piece, fastener, and accessory the wall needs.
Start with the wall itself. Measure each elevation from corner to corner at the top, middle, and bottom.
Record these numbers:
- Overall wall width and height for each elevation
- Window and door openings, with their positions
- Corner locations and outside corner returns
- Roof-to-wall transitions and parapet heights
- Any penetrations, vents, or fixtures
Then convert those measurements into a panel layout. Divide each wall into equal panel widths so the seams land in even, deliberate places.
For complex walls, custom fabrication drawings are the safest route.
Step 1: Prepare the Wall Assembly and Substrate
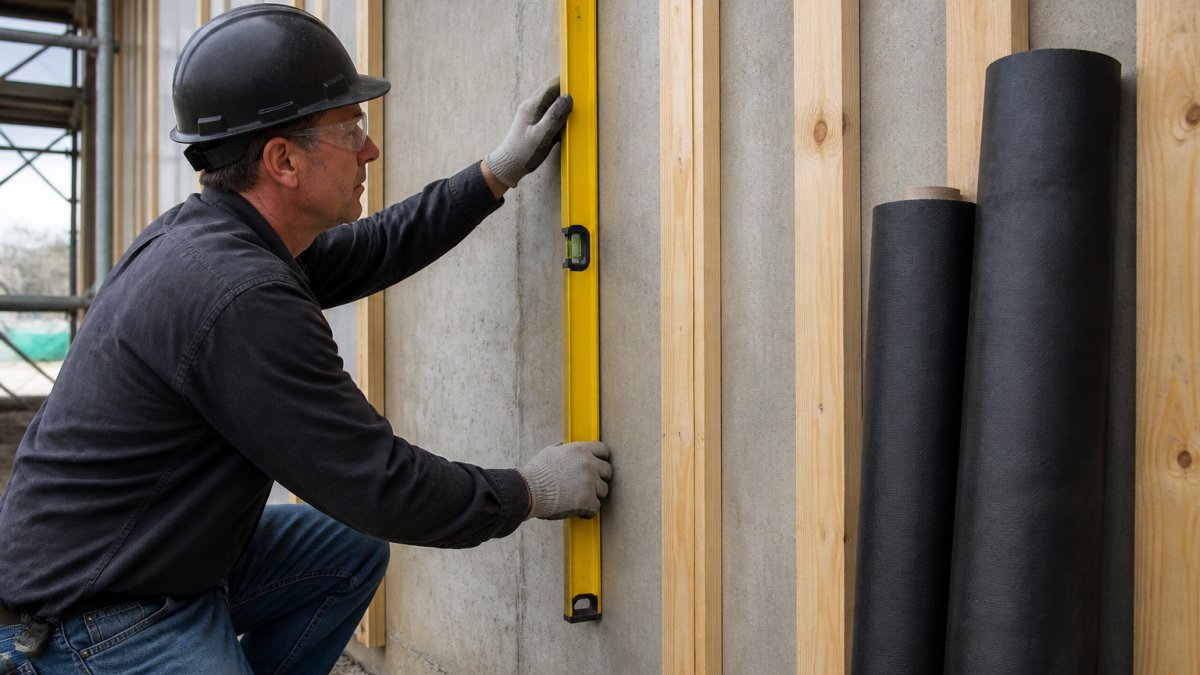
A flat, dry, well-ventilated substrate is the foundation of a copper wall. If the wall assembly is wrong, the panels will telegraph every bump, and copper, being soft and reflective, telegraphs more than most cladding. This is also where a wall differs most from a roof: a wall is vertical, so water clings, wicks, and sits at the base instead of running off.
Build the assembly in layers
Work from the sheathing outward:
- Sheathing and flatness. Check sheathing for flatness with a 1.2 m level or straightedge. Gaps and humps show through copper. Correct framing or sheathing before anything else goes on.
- Weather-resistive barrier (WRB). Install the WRB over the sheathing, lapping courses per the manufacturer's instructions and taping the seams. This membrane is your backup water plane, the copper is the primary plane, the WRB is what catches what gets past it.
- Drainage layer and furring. Vertical furring strips create a cavity behind the panels. That cavity is the rainscreen gap: it lets water drain down and air move, which keeps the back of the copper dry and reduces condensation on the panel's cold face.
- Structural support. Fasteners must reach solid framing or sheathing with enough embedment to hold. Copper panels are light, but wind loads are not, and the clips transfer that load to the framing.
Manage water at the wall's weak points
Most wall leaks happen at transitions, not in the field of the panel. Detail these before the first panel goes up:
- Base of wall. Provide a drainage path at the bottom of the cavity so water that reaches the furring can escape. Keep the base trim above grade and clear of soil, mulch, and snow pile-up.
- Openings. Integrate the WRB with window and door flashing so water at the opening drains onto the WRB and out, not behind it. Sill flashing should slope out and lap over the WRB below.
- Head and parapet. Head flashing at the top of the wall and cap flashing at parapets direct water away from the cavity. Each piece should lap shingle-style so water always runs downhill.
- Penetrations. Vents, fixtures, and pipes need their own flashing that laps into the water plane, sealant alone is a backup, not a barrier.
Keep copper compatible with what touches it
Copper is noble relative to many common building metals, which means it can drive galvanic corrosion in whatever it touches. Where copper meets other materials:
- Use stainless steel or copper fasteners and clips. Galvanized or plain steel in contact with copper can corrode.
- Isolate copper from treated lumber and from aluminum or zinc surfaces with a compatible separation membrane where they meet.
- Keep copper runoff in mind: water running off copper can stain porous materials below, so plan the base and adjacent surfaces accordingly.
Step 2: Plan Your Panel Layout and Installation Sequence
Panel layout decides how the finished wall looks. Plan it before you cut a single sheet.
Work from a control line.
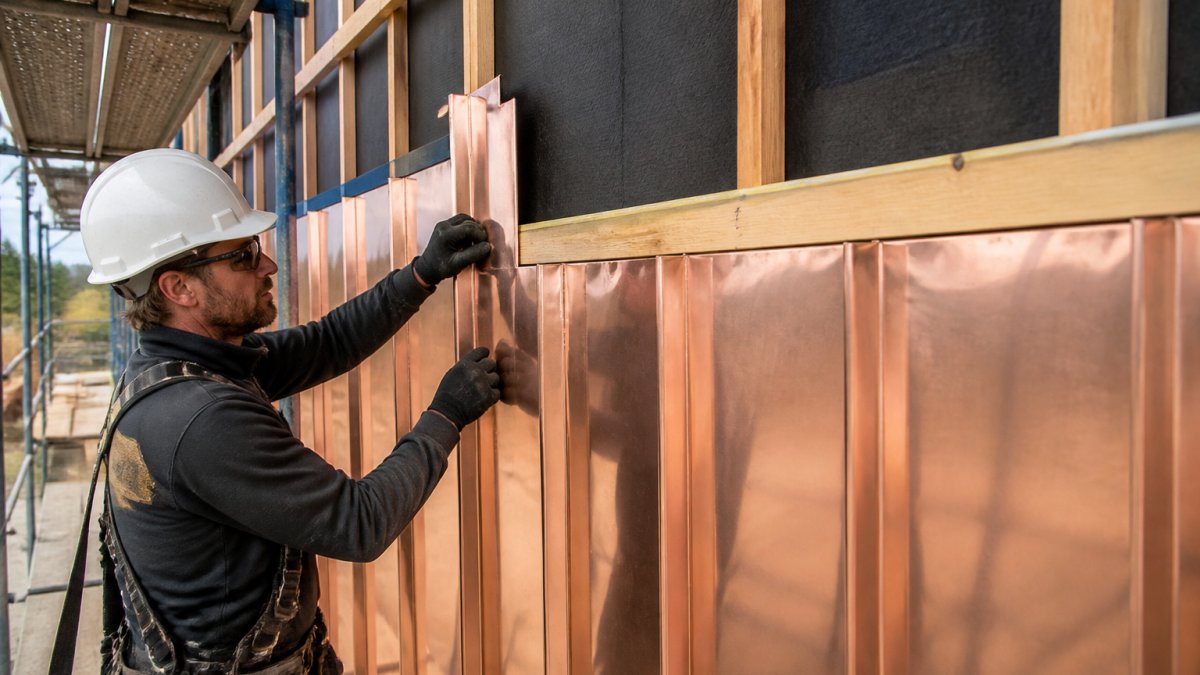
Installation sequence that works:
- Set the starter trim at the base.
- Install the first panel on the control line.
- Work outward in both directions.
- Set corner trim as you reach each corner.
- Finish with flashing at the top and at openings.
Panel orientation matters too. Vertical panels shed water well and suit most walls.
Plan your cuts so factory edges face the most visible sightlines.
Here is the installation sequence the article recommends, from the starter trim to the final flashing.
| Order | What to do |
|---|---|
| 1 | Set the starter trim at the base |
| 2 | Install the first panel on the control line |
| 3 | Work outward in both directions |
| 4 | Set corner trim as you reach each corner |
| 5 | Finish with flashing at the top and at openings |
Copper Siding Installation Details for Seams, Corners, and Flashing
Seams, corners, and flashing are where a copper wall succeeds or fails.
Panel joints and seams. Standing seam panels connect with a folded seam that hides the fastener.
Corners. Use formed outside and inside corner trim. Set the trim first, then run panels into it.
Sealants. Use them as a backup, not a primary barrier.
Weatherproofing check. Before you close each section, look at it from below.
Copper Siding Fasteners and Concealed Attachment Systems
Concealed fasteners are the standard for copper walls.
Copper siding fasteners must be compatible with copper. Use stainless steel or copper fasteners.
Concealed systems use clips or cleats fixed to the wall, with the panel hooked or locked over them.
Exposed fasteners are used in some trim and flashing details.
One issue to plan for is oil canning, the wavy distortion that shows on flat metal panels.
Copper Siding Expansion and Contraction: Getting the Gaps Right
Copper moves. It expands in heat and contracts in cold, and the wall has to allow for it.
Copper siding expansion and contraction is why panels are attached with clips and fixed at a single point, not screwed tight at every edge. For a deeper look at seam systems, see this double lock standing seam guide.
Plan for movement at three places:
- Panel ends: leave the specified gap at each end so the panel can grow and shrink.
- Seams: the folded seam allows some movement along its length.
- Flashing and trim: laps should cover the movement gap without sealing it solid.
The exact gap depends on panel length and temperature range. Long panels need more room than short ones. Follow the fabrication drawings and the panel supplier's guidance.
Copper Siding Patina and Maintenance Through the Seasons
Copper changes color over time. It starts bright and warm, darkens to brown, and eventually turns the green that most people picture.
Copper siding patina and maintenance is mostly about letting that process happen and keeping the wall clean.
What to do each season:
- Spring: rinse the wall with plain water to clear winter grime and pollen.
- Summer: check that flashing and seams are clear of debris.
- Fall: clear leaves and needles from behind panels and at the base.
- Winter: avoid letting snow and ice pile against the wall for long periods.
Use mild soap and water for stubborn dirt.
Check fasteners and clips once a year. Look for loose trim and any spot where water is not draining.
Request a Custom Copper Siding Quote
Custom copper work is not a stock-item purchase. Each wall gets its own panel layout, its own fabrication drawings, and its own trim set.
If you are planning a copper wall, the next step is a quote built on real measurements. Before you request one, review this guide to hiring architectural sheet metal subcontractors.
We serve homeowners, general contractors, builders, and architects, and offer comprehensive project management from removal to installation.
Visit the Metal Masters Inc. website for current pricing or to get a free quote.
Frequently Asked Questions
What underlayment should be used behind copper siding?
Use a high-temperature, UV-stable membrane rated for metal wall assemblies, installed over sheathing with a drainage plane and furring or a rainscreen gap. The underlayment must be compatible with copper and allow water to drain down and out. Avoid asphalt-based products that can bleed or degrade against copper. In coastal or high-rain areas, a ventilated rainscreen cavity helps the wall dry and protects the copper from prolonged contact with moisture.
How much expansion gap does copper siding need?
Copper siding expansion and contraction depends on panel length and temperature swing. As a working rule, allow roughly 1 mm of movement per metre of panel length, split between both ends, so a 3 m panel needs about 3 mm total. Use slotted clips or oversized holes so fasteners do not lock the panel. Never butt panels tight at corners, transitions, or trim; leave a gap covered by flashing or a slip joint.
How do you prevent galvanic corrosion with copper siding?
Separate copper from steel, aluminum, and zinc with isolation tape, gaskets, or non-metallic clips. Use copper or stainless steel fasteners, never galvanized or aluminum fasteners directly against copper. Keep copper run-off away from zinc and aluminum surfaces below, because copper salts in rainwater accelerate corrosion on those metals. On mixed-metal facades, detail each transition with a break and a flashing that directs water away from the lower metal.
Can copper siding be installed over existing siding?
It can, but only after the old wall is assessed. Remove loose or rotting material, confirm the sheathing is flat and sound, and add a drainage plane and furring to create a cavity. Copper is heavy and rigid, so the structure must carry the added load. Never trap moisture between old siding and new copper.
A copper wall only performs as well as its weakest detail. If you want panels formed to your actual walls and installed by the same crew that fabricated them, request a free quote from Metal Masters Inc. and we will walk your project from measurements to finished siding.