 ultimate-guide
Residential Copper Roofing Installation Best Practices
Table of Contents
- Why Copper Roofing Installation Demands a Different Approach
- Copper Roof Installation: Preparing the Deck and Substrate
- Standing Seam Copper Roof: Panel Layout, Seams, and Fastening
- Copper Roof Flashing Details: Valleys, Eaves, Ridges, and Penetrations
- Component Compatibility: Fasteners, Underlayments, and Adjacent Metals
- Copper Roof Pros and Cons for Homeowners
- Inspection Checklist and Common Installation Failures
- Frequently Asked Questions
Last Updated: October 15, 2026
Why Copper Roofing Installation Demands a Different Approach
Residential copper roofing installation best practices begin with one fact: copper moves.
Copper is not a nailed-down product. It is a mechanically seamed, floating skin that must be free to breathe. Get that principle right and a copper roof can outlast the house beneath it.
Below, we break down deck preparation, panel layout, flashing details, material compatibility, and the inspection checklist that catches problems before the scaffolding comes down.
Copper Roof Installation: Preparing the Deck and Substrate
Roof preparation starts with a flat, dry, well-fastened roof deck. Copper will telegraph every bump in the substrate, so this stage is not the place to save time.
Roof Deck Requirements and Inspection
Walk the deck and reject any board that is soft, delaminated, or cupped. Plywood or solid plank sheathing should be sound and firmly fixed, with fasteners driven flush. Check roof pitch as well: low-slope sections need different underlayment strategy than steep planes, and valleys concentrate water from two directions.
- Confirm sheathing thickness and span rating suit the design loads
- Re-nail or re-screw any loose sheathing before underlayment goes down
- Sweep the deck clean; a single screw left under the underlayment will dent the copper above it
Underlayment and Water Management
Underlayment is the roof's second line of defense. Copper is not a waterproofing membrane, and seams and penetrations will always be the first places water probes. A high-temperature, self-adhering or mechanically fixed underlayment rated for metal roofing gives the copper a clean separation layer and manages condensation that forms on the underside of the metal.
Water channel design matters just as much. Eaves need a drip edge that lets runoff clear the fascia, and valleys need an open or closed metal valley sized for the roof's catchment.
Standing Seam Copper Roof: Panel Layout, Seams, and Fastening
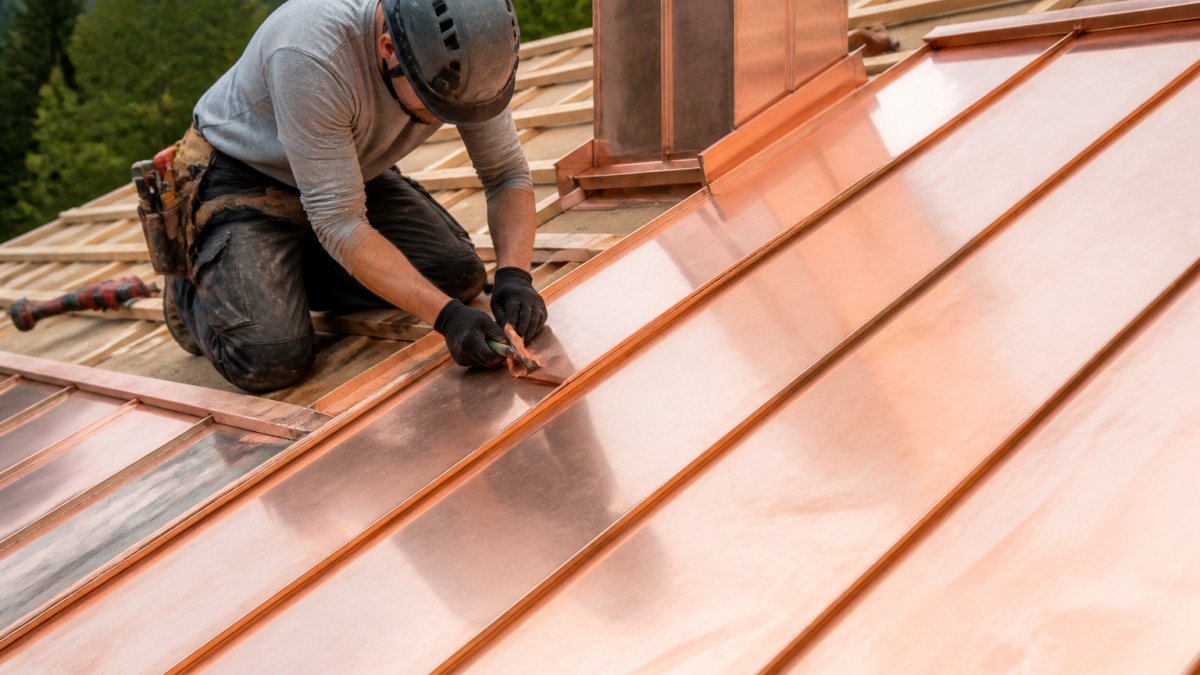
A standing seam copper roof is a system of pans joined by raised, mechanically closed seams that conceal the fasteners below. Layout, seam type, and clip selection determine whether the roof moves freely or fights itself.

Plan panel widths around the roof's geometry before any copper is cut. Panels should run from eave to ridge in single lengths wherever possible, and the layout should place seams away from valleys and high-traffic penetrations.
Thermal Expansion and Clip Selection
Fixed clips and copper panels are a bad combination. Every clip must allow the panel to slide as it expands and contracts; otherwise the fasteners take the load and eventually work loose. Clip spacing, seam height, and the number of fixed versus floating clips depend on panel length, local temperature range, and roof pitch. Longer panels need more allowance for movement, and panels over heated spaces move more than those over ventilated attics.
Copper Roof Flashing Details: Valleys, Eaves, Ridges, and Penetrations
Flashing details decide whether a copper roof stays dry. Copper roof flashing details at valleys, eaves, ridges, and penetrations carry the water that the panels shed, and each one has a specific correct build-up.
- Valleys: size the valley metal for the roof's catchment area, run it under the panel edges, and avoid soldered joints where thermal movement will crack them
- Eaves: use a drip edge that projects past the fascia so runoff clears the wall and foundation
- Ridges: cap the ridge with a formed ridge cover that laps the top of the panels and allows movement
- Penetrations: every vent, chimney, and skylight needs a purpose-formed flashing with a soldered or mechanically locked joint, never a caulk-and-hope seal
Sealant is a backup, not a primary defense. If a flashing relies on sealant to stay watertight, it will fail.
Component Compatibility: Fasteners, Underlayments, and Adjacent Metals
Component compatibility is where a lot of residential copper roofs quietly fail. Copper is a noble metal, and when it sits in contact with a less noble metal in the presence of moisture, the less noble metal corrodes. The mechanism is galvanic corrosion: moisture acts as an electrolyte, and the two metals form a small battery. The less noble metal, the anode, gives up material and corrodes, while the copper, the cathode, is protected.
Fastener and Clip Rules
Use copper, stainless steel, or copper-alloy fasteners and clips. Avoid galvanized or aluminum fasteners and clips in direct contact with copper. The galvanic series puts copper near the noble end and zinc, aluminum, and galvanized steel near the active end, so any of those in contact with copper will corrode preferentially. Where contact is unavoidable, isolate the dissimilar metals with a suitable separation layer, a neoprene or EPDM gasket, a bituminous tape, or a plastic isolator, so the two metals never touch in the presence of moisture.
Adjacent Metals and Runoff
Galvanic corrosion is not the only risk. Copper runoff is mildly acidic and can stain or corrode other materials downstream. Aluminum gutters, steel flashings, and zinc accents all need to be detailed so they never sit bare against copper and are not positioned where copper runoff will flow directly onto them. On a high-end renovation where copper and zinc accents meet, the transition details and separation layers are the difference between a clean installation and a galvanic corrosion problem.
Underlayment Chemistry
Underlayments matter here too. Some underlayments contain compounds that react with copper over time, so specify products rated for use under copper roofing and follow the manufacturer's instructions. Asphalt-based underlayments are generally acceptable when rated for metal roofing, but some synthetic underlayments and certain self-adhering membranes can contain sulfur or other compounds that attack copper. The safe approach is to confirm the underlayment is explicitly rated for copper by its manufacturer, and to avoid mixing products from different systems without checking compatibility.
A Practical Compatibility Check
Before installation, walk the roof and list every metal the copper will touch or drain onto: fasteners, clips, flashing, gutters, downspouts, vents, and any architectural accents. For each one, confirm it is copper, stainless steel, or a compatible alloy, or that it is isolated with a separation layer. Check the underlayment spec sheet for copper compatibility. This check takes an hour and prevents the most expensive class of copper roof failure.
Copper Roof Pros and Cons for Homeowners
The copper roof pros and cons come down to lifecycle versus upfront cost, and the honest answer depends on how long you plan to own the home. Copper costs more to install than asphalt or standard painted steel, and that premium is real. In exchange, copper is lightweight, requires almost no maintenance, and develops a protective patina that shields the metal beneath it.
What the Upfront Premium Actually Buys
A residential copper roof typically costs several times more than an asphalt shingle roof on the same footprint, and the gap widens with complexity: steep pitches, multiple valleys, dormers, and custom flashing all add labor and fabrication time. The premium is not just the metal. It is the skilled labor, the custom fabrication, the heavier underlayment, and the compatible fasteners and flashing that a copper system requires.
Lifecycle Value and Maintenance
Copper's case rests on service life. Asphalt shingles are commonly replaced every 15 to 25 years depending on climate and ventilation, while a well-installed copper roof is expected to last 50 years or more and often outlives the original installation crew.
Maintenance is minimal but not zero. Copper does not need painting, sealing, or shingle replacement. What it does need is periodic inspection of seams, flashings, and fasteners, and prompt repair of any dent or puncture.
Resale and Curb Appeal
Copper is a visible, high-end material, and appraisers and buyers in heritage and luxury markets often recognize it as a premium roof. That said, resale value depends on local market expectations. In a neighborhood of asphalt roofs, a copper roof may not recoup its full cost at sale, even though it lowers long-term ownership cost. In a heritage district or an area where metal roofing is common, the premium is more likely to be recognized.
When Copper Is the Wrong Choice
Copper is not the right answer for every home. If the budget is tight, if the roof geometry is simple and the homeowner plans to move within a few years, or if the home is in an area with heavy theft risk, zinc or painted steel can deliver a similar standing seam look at lower cost. Copper rewards owners who plan to stay, who value low maintenance, and who are prepared for the higher upfront investment.
Inspection Checklist and Common Installation Failures
A final inspection catches the failures that show up weeks later. Use this checklist before signing off on any copper roof installation:
- Deck flat, dry, and free of protruding fasteners
- Underlayment rated for copper and fully lapped per manufacturer instructions
- Panels run eave to ridge in single lengths where geometry allows
- Clips allow thermal movement; fixed and floating clips placed per layout
The most common failures are inadequate clip movement allowance, sealant-dependent flashings, and incompatible fasteners. Each one is avoidable with the right details and a crew trained in metal roofing.
A copper roof rewards precision, and precision is hard to retrofit. If your project needs double lock standing seam panels, custom flashing, or coordination across multiple trades, Metal Masters Inc. handles the full scope: tear-off, carpentry, custom fabrication, and installation in copper, zinc, painted aluminum, and steel.
Frequently Asked Questions
What are the downsides of a copper roof?
Copper costs more upfront than asphalt or steel, and the material price fluctuates with global metal markets. It also develops a patina over time, shifting from bright copper to brown and eventually green, which not every homeowner wants. Copper is softer than steel, so it dents more easily during installation or from falling branches. Finally, copper roofing installation requires trained sheet metal workers; not every roofing crew has the forming and seaming skills to do it correctly.
What underlayment is appropriate for a copper roof?
Copper reacts with many common underlayments. Asphalt-saturated felt and most self-adhering membranes contain sulfur compounds that corrode copper from underneath. Use a copper-compatible underlayment such as a high-temperature polypropylene or polyethylene membrane rated for metal roofing, or a slip sheet approved by the panel manufacturer. Always follow the panel maker's written instructions, since some warranties are voided by incompatible underlayment. Check that fasteners holding the underlayment are also copper-compatible.
How should copper roofing seams and flashings be detailed?
Standing seams should be formed with a double lock and spaced to allow thermal movement, typically with concealed clips rather than through-panel fasteners. Flashing details at valleys, eaves, ridges, and penetrations should be fabricated from the same copper alloy and thickness as the panels, with soldered or lapped joints designed to shed water. Avoid mixing copper flashings with aluminum or galvanized components, since contact causes galvanic corrosion. Every detail should follow the manufacturer's instructions and the project's engineered drawings.
Can copper roofing be installed over an existing roof?
Sometimes, but it depends on the structure and the existing roof condition. Copper is lightweight, so added load is rarely the issue. The bigger concerns are trapped moisture, uneven substrate, and whether the old roof contains materials that will corrode copper. In most residential projects, the old roof is removed so the deck can be inspected, repaired, and covered with a copper-compatible underlayment. A qualified installer should assess the deck before deciding.
How do you prevent staining and corrosion around copper roofing?
Runoff from copper will stain concrete, masonry, and some siding below the roof line, so plan drainage and consider protective coatings on adjacent surfaces. Keep copper away from aluminum, galvanized steel, and untreated steel to avoid galvanic corrosion. Use copper or stainless steel fasteners, and specify underlayments and sealants that are chemically compatible with copper. Regular inspection of seams, flashings, and penetrations catches small issues before they become corrosion problems.
Is 3/12 pitch ok for metal roof installation?
A 3/12 pitch is workable for many metal roofing systems, but the specific minimum slope depends on the panel profile and the manufacturer. Standing seam panels generally handle lower slopes better than through-fastened panels. At 3/12 or lower, the underlayment becomes a critical secondary water barrier, and panel seams and end laps must be detailed to prevent capillary action. Always confirm the minimum slope in the manufacturer's installation instructions and any applicable building code requirements.